How to Light a Film Scene on a Low Budget
Great lighting doesn't require a rental house budget. Here's how to build cinematic-looking scenes with affordable tools and smart technique.
Good lighting is the single fastest way to make your film look professional. Bad lighting is the fastest way to make it look like a home video, no matter what camera you're shooting on. Here's exactly how to get cinematic results without spending a fortune.
Understand Light Before You Buy Any Gear
Most low-budget lighting mistakes aren't gear problems. They're knowledge problems. Before you spend a cent, you need to understand three things: light direction, light quality, and color temperature.
Direction is where the light comes from relative to your subject. Quality refers to whether the light is hard (sharp shadows, like direct sun) or soft (diffused, wrapping around the subject). Color temperature is measured in Kelvin, and it tells you whether your light looks warm (tungsten bulbs sit around 3200K) or cool (daylight runs around 5600K).
The ASC recently published a breakdown of *Heated Rivalry*, where cinematographer Eric Yue used cool and warm tones to visually separate characters in conflict. He didn't do that with expensive fixtures alone. He did it with intention. You can do the same thing with a $40 LED panel and a roll of CTO gel (an orange filter that warms a light source).
"The most expensive light on a low-budget set is the one you didn't know how to use."
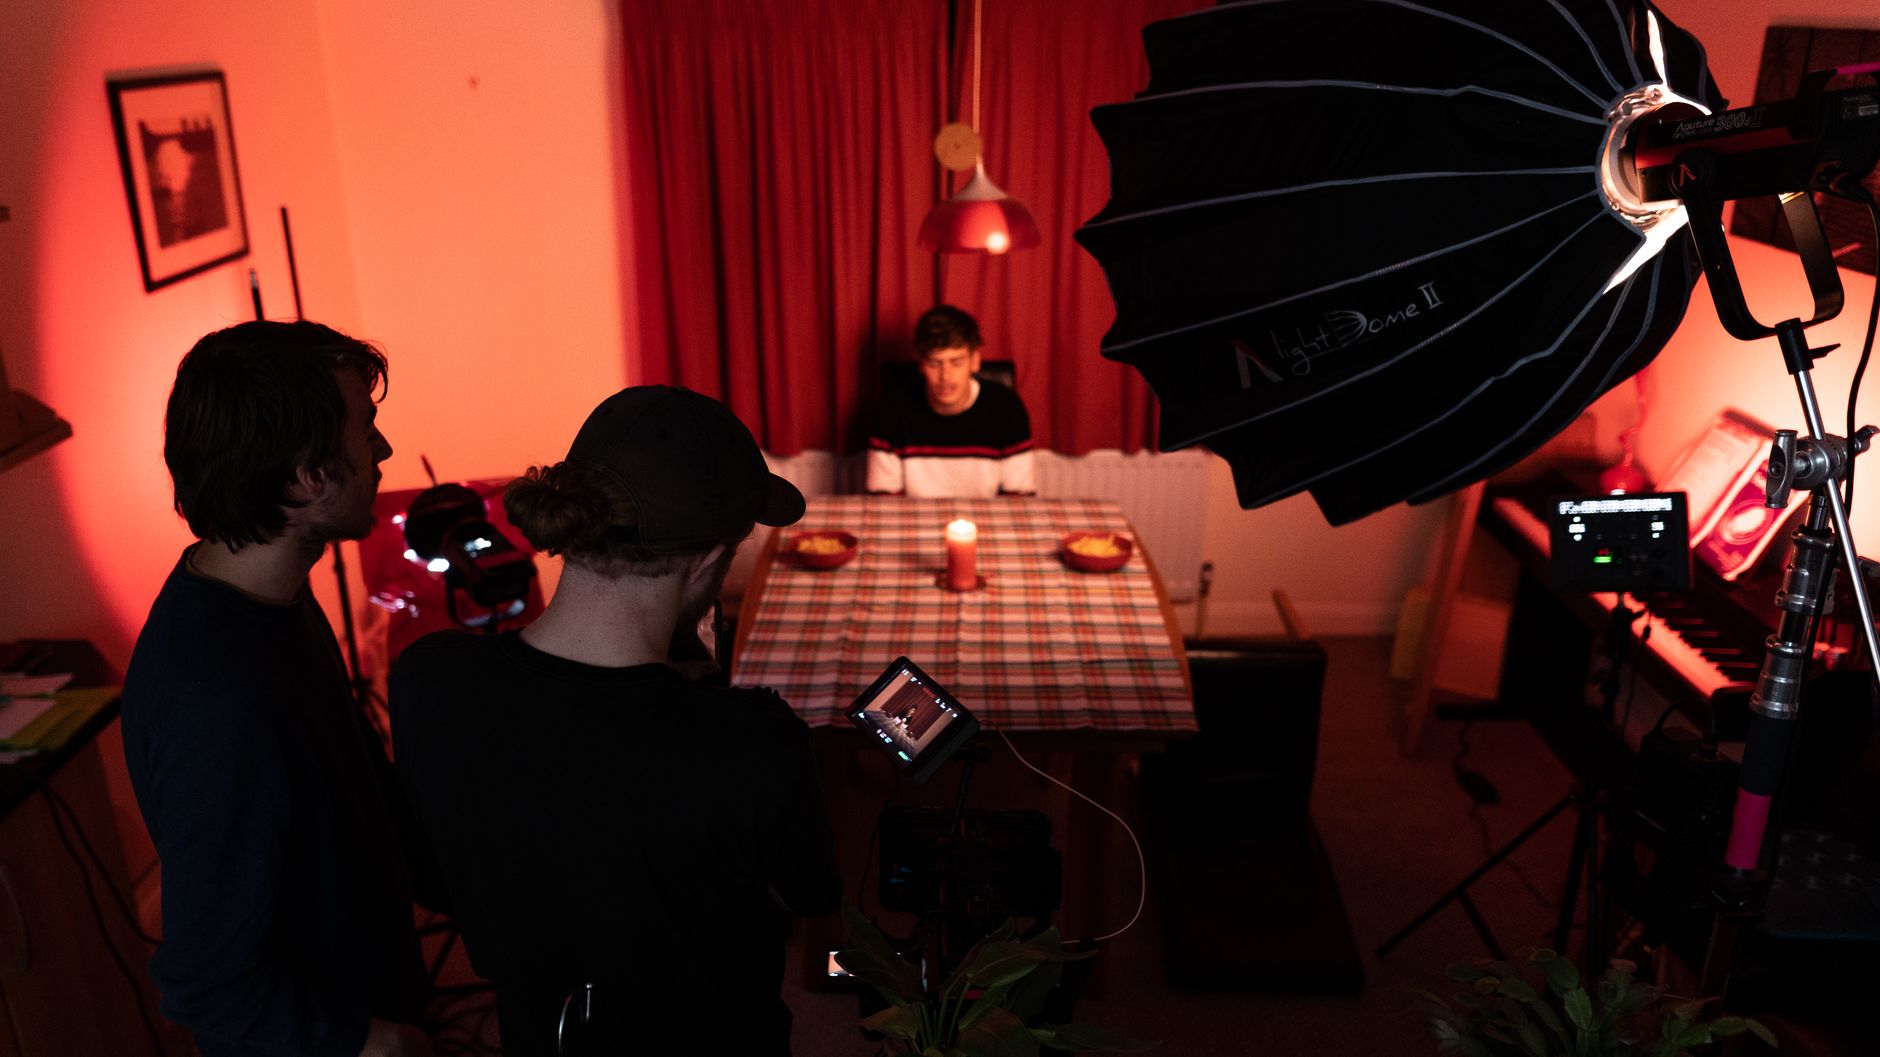
Use Practical Lights as Your Foundation
Practical lights are any light source that appears in the frame: a lamp, a neon sign, a candle, a TV screen. These are your best friends on a tight budget because they do double duty. They light the scene and they motivate the look.
Here's what I mean by motivate: if there's a practical lamp in the corner of your frame, the audience accepts that warm, directional light hitting your actor's face. It feels real. You didn't need to explain it. You just placed a $15 lamp from a thrift store and let it do the work.
Some go-to practical light setups:
- Clamp a household LED bulb inside a paper lantern for instant soft ambient light
- Use a laptop or tablet screen to create cool, flickering fill light on a face
- Run a string of Edison bulbs along a wall for warm background depth
- Bounce a cheap LED work light off a white foam core board for a soft key (the primary light on a subject)
The Terrifier franchise built much of its early visual identity on exactly this kind of resourceful lighting. Practical sources, deliberate placement, and an understanding that darkness is also a tool.
Build a Starter Kit That Actually Works
You don't need a full lighting package. You need a small kit that gives you flexibility. Here's what I'd recommend building first.
Start with two Aputure Amaran 100x LED panels. They're bi-color (adjustable between warm and cool tones), they're bright enough for most interior setups, and they cost around $150 each. That's your key light and fill light covered.
Get a softbox or a cheap 24x24-inch diffusion frame. Hard light looks harsh on skin. Stick your LED through a softbox and it wraps your subject beautifully. Cheap softboxes on Amazon work fine. The light doesn't care what brand the modifier is.
Buy a C-stand or two. Cheap ones from Impact or Neewer hold up fine on controlled sets. You need something to hold your lights that isn't your grip's tired arms.
Pick up a pack of Lee Filters gel sample sheets. A full sample pack runs about $20 and gives you dozens of colors. CTO, CTB (a blue filter that cools a light source), plus diffusion and ND gels. This is where real creative control starts.
Total starter kit: roughly $400 to $500. That's less than one day of renting a single HMI (a high-intensity discharge light used on larger productions).
Natural Light Is Free, Use It Intelligently
Windows are the most underrated light source in filmmaking. A large north-facing window gives you soft, consistent daylight that doesn't shift dramatically through the day. That's a professional-quality soft box that costs nothing.
The trick is controlling it. Hang a white shower curtain or a sheet of diffusion film (like Lee 216) across the window to soften the light further. Use black V-flats (two large pieces of black foam core taped together) to flag (block) light spilling where you don't want it.
If you're shooting handheld documentary-style on an iPhone, the way the ASC recently covered, window light plus a simple reflector (even a piece of white foam core) can give you images that cut together with professionally lit footage. Light quality matters more than light source.
Controlling Daylight on Location
Shooting exteriors is trickier. Direct midday sun is your enemy. It creates harsh shadows under the eyes and nose, and it overexposes your highlights while crushing your shadows.
Shoot in the golden hour (the hour after sunrise or before sunset) whenever you can schedule it. Or find open shade. A building, a tree canopy, even a large white tent overhead turns brutal sun into usable, soft light.
If you're stuck in midday sun, use a 5-in-1 reflector to redirect light and a translucent scrim above your subject if the scene calls for it. Work with what you've got.
Color Temperature and Mood on Zero Budget
This is where a lot of low-budget films leave money on the table, creatively speaking. Mixing color temperatures intentionally creates mood without any additional spending.
Leave a practical tungsten lamp in the background (warm) while lighting your subject with a slightly cooler source. That contrast reads as tension, intimacy, or unease depending on context. Yue's work on *Heated Rivalry* is a masterclass in this. He used temperature separation to tell the story visually before a single line of dialogue.
You can replicate this with gels on your LED panels. Warm the background practical with a half-CTO gel. Keep your key light neutral or slightly cool. Suddenly your image has depth and contrast that doesn't come from expensive lenses or cameras. It comes from understanding color.
Common Low-Budget Lighting Mistakes to Avoid
Flatness is the biggest one. If your key light and fill light are both the same intensity and direction, your subject looks like they're in a passport photo. Kill your fill or drop it significantly. Embrace shadow.
Lighting the background as an afterthought is another. Your background should have its own motivation and its own depth. A single practical or a strip of backlight behind your subject separates them from the wall and adds dimension.
Finally, don't underestimate bounce cards. A single white foam core board positioned to catch spill light and bounce it back as fill can replace a second light entirely. I've lit entire interview setups with one LED and one bounce card.
Key Takeaways
- Learn direction, quality, and color temperature before buying any gear
- Practical lights in-frame double as motivation and production design
- A starter LED kit (two panels, softbox, gels, C-stands) runs under $500
- Natural window light with diffusion and black flags rivals expensive studio setups
- Intentional color temperature mixing creates mood and visual storytelling at no extra cost
Frequently Asked Questions
Q: What's the single most affordable lighting upgrade for a beginner filmmaker?
A: A pack of Lee Filters gel samples and a roll of white foam core. Gels let you shape and color existing light sources, and foam core acts as a free bounce or flag. Together they cost under $30 and immediately expand what you can do with any light you already own.
Q: Can you shoot a professional-looking scene with just one light?
A: Absolutely. One strong key light, a bounce card for fill, and a practical in the background is a complete three-light setup that costs almost nothing. The key is placing your single source at a 45-degree angle to your subject and at roughly eyeline height or slightly above.
Q: How do you avoid that flat, amateur look that cheap LED panels often produce?
A: Soft the light first, using a softbox or bounce off a white wall. Then drop your fill ratio so there's real shadow on one side of the face. Finally, backlight your subject with even a small LED or practical to separate them from the background. Those three moves alone fix most flat lighting problems.